Welcome to the website of Dongguan Tuowa Machinery Manufacturing Co., Ltd!
丨 Sitemap
丨 Product
丨 contact us
丨 CN
-
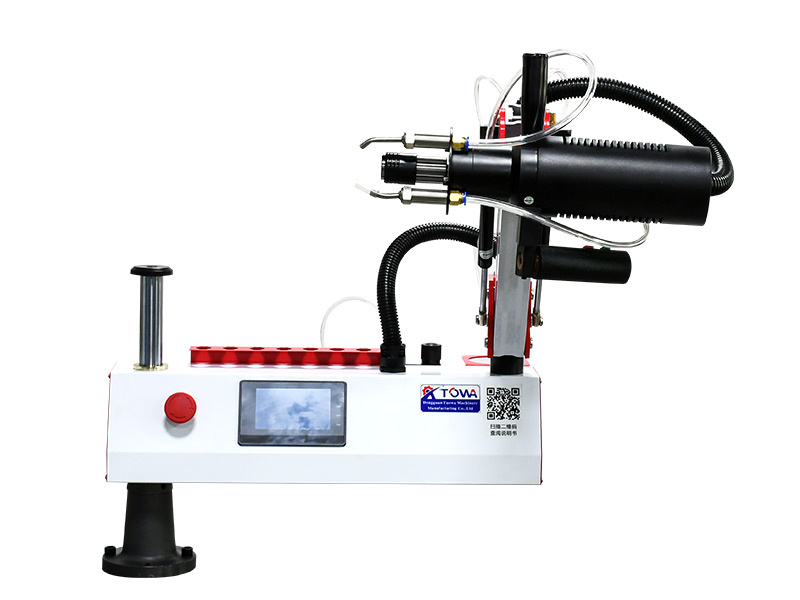
Focus on the production of tool grinders and multi-functional tool grinders
- Service hotline:
- 138-2575-1784


News
1. Precautions during purchase:
1.1 The machine has passed the qualification inspection and strict packaging treatment before delivery, but in consideration of the transportation process and other factors, special attention should be paid before installation. If there is any abnormality, please inform the product dealer or the relevant personnel of the company.
1.2 Whether the internal assembly parts and wiring are missing and consistent with the instructions.
2. Place of use and environment:
2.1 It is strictly prohibited to have strong signal interference around the equipment. Such as welding.
2.2 It is forbidden to use the power supply shared by the ground wire and the neutral wire.
2.3 Do not work in places with low humidity, high temperature and severe dust fall.
2.4 Places without corrosive gas.
2.5 Places without vibration and electromagnetic interference.
2.6 Places where maintenance, repair and inspection are relatively easy.
3. Precautions during installation and use:
3.1 The equipment must be safely grounded before commissioning and use to prevent electric shock.
3.2 Be sure to install in the order of installation.
3.3 During installation, do not put your hand into the cantilever bracket or the position with "Warning" sign to avoid accidental injury.
3.4 After the machine is installed, pay attention to the random swing of the cantilever support to avoid injury.
4. Precautions in use:
4.1 Pay attention to the sharpness of the tap during use. If the tap is seriously worn, replace it in time. Otherwise, it will cause excessive torque, affect the service life of the equipment, and easily cause tooth breakage and wire breakage of the workpiece.
4.2 Please use special tapping oil.
4.3 The perpendicularity between the equipment and the workpiece must be adjusted before the equipment works normally.
5. Assembly instructions:
5.1 Open the package and check whether the spare parts are complete according to the packing list
5.2 Please select a worktable that can be installed. The worktable shall be flat, neat and stable.
5.3 Please fix the mounting hole at the appropriate position of the selected worktable, and then fix the fixing seat on the worktable.
5.4 Please install the spare parts one by one according to the equipment installation diagram (as shown in the figure). When everything is ready, the installation is complete.
6. External wiring:
Carefully check the surrounding environment to see if it has any impact on the wiring, and power on immediately after everything is checked.
Warning: Before power transmission, the equipment must be grounded safely to avoid "electric shock".
7. Main interface of touch screen and its functions
7.1 Startup interface
When 220V (50HZ) AC power is supplied, the system enters the startup interface, as shown in Figure 7-1. After clicking "Welcome", the system will enter the manual tapping mode by default, as shown in Figure 7-2.
Figure 7-1
7.2 Manual tapping mode
Manual tapping is also known as inching tapping. Click the corresponding value in "Tapping speed" or "Backing speed", and a menu as shown in the figure will pop up, as shown in Figure 7-2. Set the speed according to the tapping size. Then "confirm", the equipment will enter the working state according to the set input "tapping speed"/"withdrawal speed", and then align the holes drilled in advance, press the forward switch for tapping, and press the reverse switch to exit tapping after tapping is completed.
Figure 7-2
7.3 Automatic tapping mode
Click the "Manual/Automatic" switch button on the touch screen, and the system will enter the automatic mode. Tapping in the automatic mode is to conduct forward tapping from the tool setting point to the preset tapping depth at the preset tapping speed. After reaching the tapping depth, the automatic tapping action is completed by reversing to the tool setting point and the preset safety plane height at the preset tapping speed. As shown in Figure 7.3-1. In this mode, "pitch", "depth", "attack speed" and "retreat speed" must be input correctly before normal operation.
7-3-1
Taking the M12 tap as an example, first set the "tapping speed" of 150 rpm, the "retreat speed" of 160 rpm, the "depth" of 20 mm, and the "pitch" of 1.75 mm (you can click the value corresponding to the "pitch" in the menu as shown in Figure 7-3-2), then a menu as shown in Figure 7-3-3 pops up, input the correct pitch of 1.75, and click Enter; Alternatively, click "Metric pitch" in the menu [Fig. 7-3-4], and an interface as shown in Fig. 7-3-5 will appear. Select M12). All parameters are set. As shown in Fig. 7-3-6, start the forward tapping button, and the equipment will work normally according to the set parameters. In case of emergency during normal tapping. Press the reverse switch to immediately interrupt automatic tapping.
Figures corresponding to "pitch" in 7-3-2 point menu (indicated by red box in the figure)

7-3-3 Enter the correct pitch 1.75 and click Enter
"Metric pitch" in 7-3-4 point menu (indicated by red box in the figure)
7-3-5 Select M12
7-3-6
7.4 Intermittent tapping mode
Click "Transfer to Intermittent Mode" in the manual/automatic mode interface, and the system will enter the intermittent tapping mode, as shown in Figure 7-4. This mode is mainly used for deep hole tapping and hard material tapping. This mode can be selected when this material is encountered.
The intermittent tapping mode is similar to the automatic tapping mode, mainly adding two parameters: "depth of feed" and "depth of retreat":
(1) "Feed depth": divide one tapping into multiple tapping, and the depth of each tapping is the set value of this parameter.
(2) "Retract depth": when each tapping distance reaches the "Feed depth", reverse the distance of "Retract depth" and start the next tapping.
In this mode, click "Automatic Mode"/"Manual Mode" to switch to the "Manual/Automatic" mode interface.
7-4
7.5 Fault reset
In the manual/automatic/intermittent mode, if the system is stuck or has other faults during the tapping process, the servo driver will alarm for protection and inform the user through the touch screen. The user only needs to eliminate the fault and click "fault reset" to cancel the alarm.
8. Fault judgment
According to the table below, the cause of the fault can be determined and eliminated.

9 Use and maintenance of bobbin clamp
MOY series tap collet is an advanced thread processing tool with automatic thread pitch compensation and safety overload protection device. It has the advantages of flexible action, stable button torque, safety and reliability, and long service life.
9.1 Use of collet
9.1.1 Install the screw tap: please push the positioning sleeve at the front end of the collet, insert the screw tap into the square hole of the sleeve, loosen the positioning sleeve, and the screw tap will be locked;
9.1.2 Install the tap bobbin clamp: please push the movable sleeve at the front end of the quick change body, insert the bobbin clamp into the hole (the bobbin clamp claw is aligned with the groove), release the movable sleeve, and the bobbin clamp will be locked;
9.1.3 Torque adjustment: the rated torque of various specifications of bobbins has been adjusted before delivery, and must not be disassembled at will. See the attached table for the rated torque of the bobbin clamp, and the starting deviation shall not be greater than plus or minus 10%.
9.2 For the maintenance of the bobbin clamp, the bobbin clamp shall be placed in a dry place and coated with anti rust oil when not in use. Prevent damp and rust.
Note:
(1). When the bobbin clamp is delivered from the factory, the torque has been adjusted. If the torque is not enough, the following operations can be done: first take out the fixed snap ring with a tool, then clamp the snap hole with a snap ring pliers, turn clockwise, the torque becomes larger, and finally install the fixed snap ring. On the contrary, the torque becomes smaller.
(2). If the bobbin clamp makes a "rattling" sound in the working state, it indicates that the bobbin clamp is slipping. Stop working immediately, and then work again after adjustment, so as not to affect the service life of the bobbin clamp.
Precautions:
(1) When tapping (threading), the fixed parts to be machined must be fixed on the workbench (excluding the dead weight of the workpiece).
(2) This product needs to be equipped with machine taps (manual taps cannot be used). Suggestion: straight slot tap or tip tap can be used for through-hole; The blind hole uses a screw tap to make the chip removal more smooth and improve the production efficiency.
(3) In the process of work, please add tapping oil properly, and blow away the sundries and scraps on the tap.
(4) If the work stops due to chip removal, please exit the tap in time and clean up the waste.

scan
开云(中国)

 138-2575-1784